How to Replace Shower Caulking Without Leaks
By Vitalii Nestorenko · July 26, 2026 · 7 min read
A dark, cracked line around the tub might look like a cleaning problem, but it is often a failed water seal. Learning how to replace shower caulking is one of the most useful small repairs a homeowner can make. Done properly, it keeps water out of the wall, protects drywall and flooring, and makes the whole bathroom look cared for.
The key is not applying a thicker bead over the old one. New caulking only performs as well as the surface beneath it. Removing every loose piece, cleaning away residue, and allowing the area to dry fully are what separate a tidy repair from one that peels away in a few months.
When shower caulking needs replacement
Caulking around a tub, shower base, wall panels, or tile should be flexible and firmly attached on both sides of the joint. Replace it when it has cracks, gaps, shrinkage, staining that will not clean off, or sections pulling away from the wall or tub.
Mildew alone does not always mean the caulk has failed. Surface mildew can sometimes be cleaned. But if black spotting has grown through the sealant, the bead feels brittle, or water can get behind it, replacement is the better fix. Do not ignore a gap at the bottom of a shower wall. Water follows gravity, and a small opening can send moisture where you cannot see it.
Before starting, look for signs of a larger issue. Soft drywall outside the shower, loose tiles, a spongy floor, or persistent staining on a ceiling below may point to water damage behind the enclosure. Fresh caulking will not solve an active plumbing leak or a failed shower pan.
What you need to replace shower caulking
For most tub and shower joints, choose a quality 100% silicone sealant labelled for kitchen and bath use. It remains flexible, handles regular moisture, and is more mildew-resistant than many basic acrylic products. Clear silicone can work on some surfaces, but white is usually the cleanest choice for white tubs and surrounds. Match the colour carefully if you are sealing around tile.
You will also need a caulk gun, a sharp utility knife or caulk removal tool, a plastic scraper, painter's tape, clean rags, rubbing alcohol or an appropriate bathroom surface cleaner, gloves, and a small bowl of water for smoothing. Keep paper towel nearby. Silicone is messy once it gets on your hands, fixtures, or flooring.
Avoid using a general-purpose painter's caulk inside a shower. It may be easier to apply and clean up, but it is not designed for a constantly wet joint. Also check the sealant label for its cure time. Many silicone products need at least 24 hours before they are exposed to water, and some require longer in cool or humid conditions.
Remove every bit of failed caulk
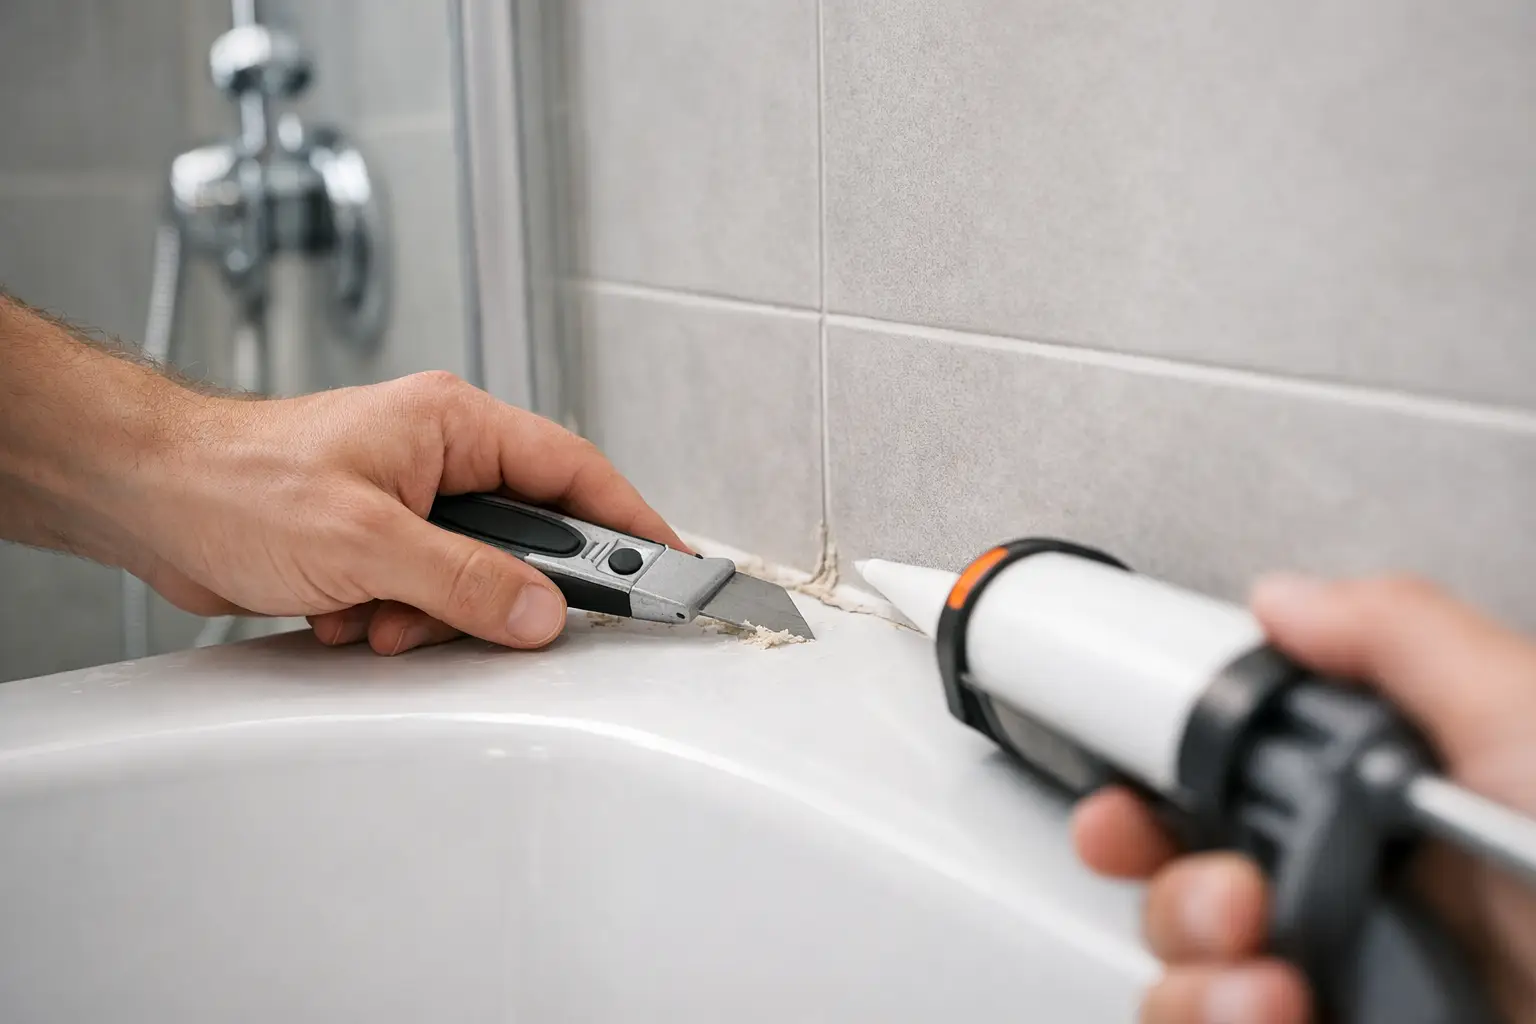
Start with a completely dry shower. If the shower has been used recently, give it time to air out, then wipe the joint dry. Run a utility knife carefully along both edges of the old caulk bead. Pull away what you can in long strips, then use a plastic scraper or removal tool to lift remaining material.
Work patiently around corners, tile edges, and acrylic surrounds. A metal scraper can scratch a tub, shower base, or glass enclosure, so use it only with care. If old silicone is stubborn, a silicone caulk remover can help soften residue, but follow its instructions and keep the area well ventilated.
This stage matters more than most people expect. Silicone does not reliably bond to old silicone, soap residue, dust, or damp surfaces. A thin film left in the joint can cause the new bead to separate early, even if it initially looks perfect.
Once the old material is gone, vacuum or wipe away debris. Clean the joint thoroughly, then wipe it with rubbing alcohol to remove remaining oils and residue. Let the area dry completely. If possible, leave it overnight with the bathroom fan running or a window open. Caulking over moisture traps it behind the seal.
Check the size of the gap
A narrow, consistent joint is straightforward to seal. If the gap is wider than about 6 mm, very deep, or uneven because the tub or shower base has shifted, the repair may need more than a surface bead. Foam backer rod can support sealant in a large joint, but movement in the enclosure should be investigated first.
For a bathtub, fill the tub with water before applying caulk if there is noticeable flex when it is full. The weight settles the tub into its working position, so the cured caulk is less likely to pull apart later. This step is not usually needed for a rigid tiled shower base, but it can make a real difference on some acrylic tubs.
Apply a clean, watertight bead
Cut the caulk tube nozzle at a 45-degree angle. Start with a small opening. You can always make it larger, but a nozzle cut too wide produces an oversized bead that is harder to control. Puncture the inner seal if required, load the tube into the caulk gun, and test the flow on cardboard first.
Painter's tape is worth using if you want crisp edges, especially against textured tile or a fibreglass surround. Place tape on both sides of the joint, leaving a gap just wide enough for the finished bead. Press the tape down firmly so silicone cannot creep under it.
Hold the nozzle at roughly 45 degrees and pull the gun steadily along the joint. Keep consistent pressure on the trigger. A continuous bead is better than several short starts and stops, although you can pause at a corner if needed. Do not try to make the bead excessively thick. It should bridge the joint, contact both surfaces, and be wide enough to flex with normal movement.
Smooth the caulk right away. A lightly dampened finger works well for many homeowners, while a caulk finishing tool gives a more consistent profile. Use one smooth pass with light pressure to push sealant into the joint and remove excess. Wipe your finger or tool often with paper towel.
Pull painter's tape off immediately after smoothing, while the caulk is still wet. Peel it slowly at an angle away from the bead. If an edge needs a minor touch-up, do it before a skin forms on the silicone.
Do not seal drainage paths
Some shower doors, frames, and shower pans have weep holes that let collected water drain back into the shower. Do not caulk over these openings. Blocking them can trap water in the frame and create leaks outside the enclosure.
Likewise, follow the manufacturer's instructions for prefabricated shower systems. Some wall panels and trim pieces have specific sealing locations, and caulking every visible seam is not always the right approach.
Let the caulk cure before using the shower
This is where a good-looking repair is often ruined. Silicone may feel dry on the surface after a few hours, but it is not fully cured. Keep the shower dry for the exact time listed on the tube. As a practical rule, plan on at least 24 hours, and give it longer if the bathroom is cool, humid, or poorly ventilated.
Do not run the shower briefly to test it. Once the cure time has passed, inspect the bead for thin spots, holes, or sections that did not bond. Then use the shower normally and keep the exhaust fan running during and after bathing. Ventilation reduces moisture that feeds mildew and helps the new seal last longer.
When it is smarter to call for help
Replacing a simple caulk bead is a manageable job, but some situations deserve a professional eye. Call for help if the tub is moving, tiles are loose, there is soft drywall, water damage is visible outside the shower, or mould returns quickly after replacement. These are signs that water may be getting behind the finished surface.
It can also be worth booking help when you are preparing a rental unit, listing a home, or handling several repairs at once. A clean caulk line makes a bathroom look finished, but it should be part of a repair that addresses the cause of the damage. Nestor's Home Help provides practical caulking and small repair service for homeowners and landlords in Calgary, Airdrie, Okotoks, and Cochranewho want the job completed cleanly and on schedule.
A well-sealed shower should disappear into the background: no dark gaps, no peeling edges, and no worry every time water hits the wall. Give the new caulk enough preparation and curing time, and it will do exactly what it is meant to do - protect your home quietly, every day.
Vitalii Nestorenko is the owner of Nestor's Home Help, a licensed and insured handyman business in Calgary. He holds a Master's degree in mechanical engineering and does every job himself.